Back when I first began to listen to records in the Fifties you put Theresa Brewer or Elvis Presley on the ‘record player’ and ‘dropped the needle’. Since then the record player has become the turntable and the needle, the stylus, which resides in a cartridge. Turntables and cartridges gave way, for awhile, to the digital CD, but now they’ve come roaring back as more and more people realize what “audiophiles” have always known: analog records sound better and more real than digital CDs. Not only do they sound better, records are a catalog of a great deal of music which has never found its way to CD and they provide a link to the past for what is still the largest marketing demographic, we ‘baby boomers’.
Judging by the numerous posts on the ever growing number of websites devoted to the resurgence of vinyl records, a lot of ‘boomers’, and their offspring, are seeking information on how best to realize the benefits of the latest technology in analog reproduction. To that end, Moon Dog Records have asked me to contribute what I have learned over more than fifty years of listening and study in regard to getting the most out of your vinyl playback system.
Music, and for that matter, speech, are about turning vibrations into sounds the brain can recognize.
Vocal chords, reeds, stretched animal skins and chunks of wood are caused to vibrate, which in turn cause the air around us to vibrate and create sounds. Records are just another way of creating those vibrations. The wiggles the record lathe cutting head puts onto a vinyl disc cause the stylus to vibrate, which in turn causes electrons to vibrate which eventually, through speakers, make the air to vibrate. Vinyl playback is all about vibration; controlling the vibrations of the stylus so that there is more music than noise transmitted to the ear. A little pedantry, for which I make no apologies, goes a long way toward emphasizing the importance of getting the interface between the record and stylus just right.
Getting the stylus to do its job involves four essential adjustments:
Setting the tracking weight of the cartridge so its suspension allows the stylus to ride properly on the record, called VTF, Vertical Tracking Force,
Adjusting the tonearm so that the stylus re-creates the angle at which the cutting lathe imparted the grooves to the record, called Stylus Rake Angle, SRA,
An additional tonearm adjustment that causes the stylus to ride at exactly 90 degrees to the record surface, called Azimuth,
And, one more tonearm adjustment that allows the stylus to exert equal pressure on both sides of the grooves, called Tonearm Bias, or anti-Skate
Before we can address adjusting the tonearm and stylus, we have to deal, as best we can, with isolating them from the world outside and the record playing system itself. Consider that the planet and all its inhabitants, parts and pieces are in constant movement, creating vibrations of their own. That’s ambient noise. The record playing system – turntable and electronics and speakers – add their own contribution. Hopefully, your own record player has been designed to isolate itself from the outside world; that it has a way of dampening external vibration directly transmitted, turns the record at a consistent, accurate speed and does nothing to impede the transit of the stylus as it traces the records grooves.
We can help even the humblest of record players perform to its best in many ways. Some involve optimizing the manufacturers design, making certain all the screws are properly tightened (often overlooked, it was assembled by someone with different priorities than ours), the motor is well-lubricated, lead-out wires are dressed away or at right angles to others, especially power cords, that the shelf upon which the player resides is isolated from the vibrations caused by foot traffic nearby, and, most important of all, the platter is dead level in relation to the tonearm. Others concern the numerous ‘tweaks’, methods of doing these things and more, and various schools of thought, often conflicting, about how they should be done. Too numerous to go into here, I will append some references at the end of this article.
After all the adjustments to situating the player are done, it’s time to level the platter. If the record player has a means to adjust the level of the platter, we can safely ignore, to a certain extent, the level of the chassis and top plate as well as the shelf it sits upon. If the relationship of the platter to the chassis is fixed, and the chassis is supported by four feet, I strongly recommend replacing those four with three.
Many turntables and even some cartridges have a little round bubble level included with them. Give it to your children or the cat to play with. Go to the hardware store, home center or lumber yard and spend $3 on a line level. That’s a 3” long, hexagonal shaped bubble level with prongs at each end so it can be attached to the line that builders use to level a foundation or deck. Place it on the platter centered directly in the sight-line between the headshell of the tonearm and the platter spindle. Now make whatever adjustments are necessary to center the bubble. The tonearm must be free to trace the grooves with as little impediment as possible. No matter how good the bearing it rides on, there is friction. Achieving level across the arc it travels from beginning to end of the record ensures that only the friction of the bearing and that of the stylus on the vinyl will impede its travel. All other considerations of level are superfluous.
Now we’re ready for those four essential adjustments. Well, almost. There’s another, and it comes first, unless your record player has it pre-set. I’m referring to the “pivot-to-stylus” distance.
This distance varies for individual tonearms and cartridges and may be found by consulting the manufacturer’s literature. As mentioned before, the stylus describes an arc, not a straight line, as it travels across the record. Unfortunately, the record cutting lathe traveled in a straight line when it went across, so only at the center of the arc will the stylus have zero error in relation to the way the grooves were cut. The correct pivot-to-stylus distance will reduce the amount of tangential error to the minimum. There are numerous jigs available for setting this distance, your table or arm came with one, some you buy, others may be downloaded and printed. I will provide links.
Pictured is the Turntable Basics protractor which is inexpensive and easy to use. The only difficulty with it and most others is lining it up exactly with the tonearm pivot. The pencil is taped to the line on the protractor to improve the alignment. A little ingenuity of that sort will allow you to minimize the possibility of alignment error. The function of these protractors is to find the pivot-to-stylus distance that allows the stylus to sit exactly on the two placement points as well as the cartridge, and therefore, hopefully, the stylus, being parallel to the grid. Be warned that there are several mathematical formulas behind these protractors. The two most prominent ones were named for their creators, Baerwald and Stevenson. They differ in where on the record they seek to minimize tracking error, and, except for a few zealous proponents of each, achieve more or less the same audible result.
Now, we will adjust the tracking force of the cartridge. This is a straightforward process following the tonearm manufacturer’s instruction.
In all cases, if the tonearm has anti-skate or bias adjustment, disable or set it to zero. Never rely on the gradations that may be marked on the arm or counterweight except as a rough guide. Too little weight and mis-tracking will ensue, too much, and the delicate suspension of the cartridge will be damaged. There are more and more electronic scales coming on the market to do this with astonishing accuracy but they’re expensive and some, being magnetic, will damage your cartridge. For almost 30 years I have relied on the simple, effective and inexpensive Shure SFG-2 beam balance. It won’t be accurate to two decimal places, but because we’ll be fine-tuning by ear, that won’t matter. For now, setting VTF, Vertical Tracking Force to roughly the cartridge maker’s specification will do.
It’s important to know that setting Vertical Tracking Angle is simply a means of getting Stylus Rake Angle right, i.e., raising or lowering the arm to find the VTA “sweet spot” you read so much about is worthless by itself. You make this adjustment to get the Stylus Rake Angle, or SRA, as near the same as was the cutterhead that cut the record. You want the top of the stylus to be a bit farther from the pivot than the tip: 1 or 2 degrees.
Most manufacturers advise having the headshell parallel to the record, but this is merely a starting point. Achieving the proper SRA may mean having the cartridge tail up or down. Once the SRA is set visually, which probably will require a 6X magnifier, it’s time to listen to some music. Play a selection of female voice with good dynamics from soft to loud. With correct SRA, the voice will be as clear during loud, high treble passages as soft. If you hear distortion, the angle needs to be corrected.
As with most things, there is evil to go along with the good here. The perfect SRA/VTA for a thin record will not be the same for one thicker. Consequently, don’t use a wonderfully thick 200 gram recording or an incredibly thin Dynaflex for your listening tests. Choose something in between and live with the compromise.
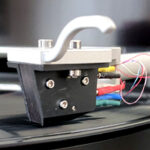
Third in line is setting cartridge/stylus Azimuth. It needs to be just as the cutterhead was, at 90 degrees to the record. On tonearms with detachable headshells, it’s quite easy to rotate the headshell a bit. Some fixed headshell arms allow for rotating the arm tube but others don’t. In the latter case, it will be necessary to shim the cartridge between its top and the underside of the headshell to correct the Azimuth.
As with SRA, a visual setting must be followed by the listening test. Don’t let the evidence of your eyes keep you from setting Azimuth at other than 90 degrees if it sounds better. You will find that Azimuth may be the most audibly adjustable parameter of the four, so do take your time with it.
Finally, you want to set the lateral tracking bias or anti-skate. Anti-skate is the resistance to the stylus’ desire to ‘skate’ towards the center of the record.
Theoretically, skating will cause an uneven pressure on the sidewalls of the groove which contain the two discrete undulations of the stereo signals resulting in an unbalanced stereo image. It’s a somewhat controversial parameter. Many people don’t believe in it and leave it at zero. That’s because there are other factors including the room and the recording itself that also influence the stereo image. One major audiophile turntable manufacturer doesn’t even have an anti-skate adjustment on his arms. The majority do, however, and the usual recommendation is to set it the same as the tracking force and that’s a good place to start. Playing music with a lot of balanced content in each channel, like a Count Basie ‘big band’ album will tell you what you need to hear. When anti-skate is off, there will be a stereo image but one channel will seem less dynamic, lifeless, in relation to the other. The difference is subtle but worth pursuing. As you change the bias setting, the offending channel will ‘snap’ into focus and be equally dynamic.
With all these adjustments done, Vertical Tracking Force and subsequently, Stylus Rake Angle must be re-visited. I know it’s tedious, but it is worthwhile. Lower the tracking force (with the anti-skate disengaged) somewhat and listen. Better or worse? Find the optimum by ear. Changing the tracking force will change the SRA so you must conduct your listening test of that parameter again as well. Finally, re-check the anti-skate as it, too, will change in relation to the tracking force.
As much as I hate doing math, this article would be incomplete without mention of arm/cartridge compatibility. Because the stylus is attached to the cartridge with a suspension, the compliance of the suspension must be compatible with the combined mass of the arm and cartridge including headshell and screws. A mismatch, too stiff a suspension, for example, with a low mass arm will cause the assembly to resonate audibly at very low frequency. A rule of thumb is that high compliance cartridges of 20 uF centimeters/second should be paired with low mass arms and medium to low compliance, with high mass. There is a very worthwhile Cartridge Database that has complete listings of nearly all cartridge specifications and a calculator for discovering those most suitable for a given arm. No math required.
It is my hope that the information here will help anyone to achieve the wonderful musical experience that is contained in every vinyl record. Please use it as a beginning, not an end, to finding your own musical “sweet spot”. All I’ve done is to try to assemble, in one place, all the vast knowledge on the subject contained in the Internet and cull out what my own preferences and prejudices disallow. Turntable set-up can be a hobby in itself; there is so much more to learn and do than the beginnings contained here. Please avail yourself of the information contained in the following links.


Back when I first began to listen to records in the Fifties you put Theresa Brewer or Elvis Presley on the ‘record player’ and ‘dropped the needle’. Since then the record player has become the turntable and the needle, the stylus, which resides in a cartridge. Turntables and cartridges gave way, for awhile, to the digital CD, but now they’ve come roaring back as more and more people realize what “audiophiles” have always known: analog records sound better and more real than digital CDs. Not only do they sound better, records are a catalog of a great deal of music which has never found its way to CD and they provide a link to the past for what is still the largest marketing demographic, we ‘baby boomers’.
Judging by the numerous posts on the ever growing number of websites devoted to the resurgence of vinyl records, a lot of ‘boomers’, and their offspring, are seeking information on how best to realize the benefits of the latest technology in analog reproduction. To that end, Moon Dog Records have asked me to contribute what I have learned over more than fifty years of listening and study in regard to getting the most out of your vinyl playback system.
Music, and for that matter, speech, are about turning vibrations into sounds the brain can recognize.
Vocal chords, reeds, stretched animal skins and chunks of wood are caused to vibrate, which in turn cause the air around us to vibrate and create sounds. Records are just another way of creating those vibrations. The wiggles the record lathe cutting head puts onto a vinyl disc cause the stylus to vibrate, which in turn causes electrons to vibrate which eventually, through speakers, make the air to vibrate. Vinyl playback is all about vibration; controlling the vibrations of the stylus so that there is more music than noise transmitted to the ear. A little pedantry, for which I make no apologies, goes a long way toward emphasizing the importance of getting the interface between the record and stylus just right.
Getting the stylus to do its job involves four essential adjustments:
Setting the tracking weight of the cartridge so its suspension allows the stylus to ride properly on the record, called VTF, Vertical Tracking Force,
Adjusting the tonearm so that the stylus re-creates the angle at which the cutting lathe imparted the grooves to the record, called Stylus Rake Angle, SRA,
An additional tonearm adjustment that causes the stylus to ride at exactly 90 degrees to the record surface, called Azimuth,
And, one more tonearm adjustment that allows the stylus to exert equal pressure on both sides of the grooves, called Tonearm Bias, or anti-Skate
Before we can address adjusting the tonearm and stylus, we have to deal, as best we can, with isolating them from the world outside and the record playing system itself. Consider that the planet and all its inhabitants, parts and pieces are in constant movement, creating vibrations of their own. That’s ambient noise. The record playing system – turntable and electronics and speakers – add their own contribution. Hopefully, your own record player has been designed to isolate itself from the outside world; that it has a way of dampening external vibration directly transmitted, turns the record at a consistent, accurate speed and does nothing to impede the transit of the stylus as it traces the records grooves.
We can help even the humblest of record players perform to its best in many ways. Some involve optimizing the manufacturers design, making certain all the screws are properly tightened (often overlooked, it was assembled by someone with different priorities than ours), the motor is well-lubricated, lead-out wires are dressed away or at right angles to others, especially power cords, that the shelf upon which the player resides is isolated from the vibrations caused by foot traffic nearby, and, most important of all, the platter is dead level in relation to the tonearm. Others concern the numerous ‘tweaks’, methods of doing these things and more, and various schools of thought, often conflicting, about how they should be done. Too numerous to go into here, I will append some references at the end of this article.
After all the adjustments to situating the player are done, it’s time to level the platter. If the record player has a means to adjust the level of the platter, we can safely ignore, to a certain extent, the level of the chassis and top plate as well as the shelf it sits upon. If the relationship of the platter to the chassis is fixed, and the chassis is supported by four feet, I strongly recommend replacing those four with three.
Many turntables and even some cartridges have a little round bubble level included with them. Give it to your children or the cat to play with. Go to the hardware store, home center or lumber yard and spend $3 on a line level. That’s a 3” long, hexagonal shaped bubble level with prongs at each end so it can be attached to the line that builders use to level a foundation or deck. Place it on the platter centered directly in the sight-line between the headshell of the tonearm and the platter spindle. Now make whatever adjustments are necessary to center the bubble. The tonearm must be free to trace the grooves with as little impediment as possible. No matter how good the bearing it rides on, there is friction. Achieving level across the arc it travels from beginning to end of the record ensures that only the friction of the bearing and that of the stylus on the vinyl will impede its travel. All other considerations of level are superfluous.
Now we’re ready for those four essential adjustments. Well, almost. There’s another, and it comes first, unless your record player has it pre-set. I’m referring to the “pivot-to-stylus” distance.
This distance varies for individual tonearms and cartridges and may be found by consulting the manufacturer’s literature. As mentioned before, the stylus describes an arc, not a straight line, as it travels across the record. Unfortunately, the record cutting lathe traveled in a straight line when it went across, so only at the center of the arc will the stylus have zero error in relation to the way the grooves were cut. The correct pivot-to-stylus distance will reduce the amount of tangential error to the minimum. There are numerous jigs available for setting this distance, your table or arm came with one, some you buy, others may be downloaded and printed. I will provide links.
Pictured is the Turntable Basics protractor which is inexpensive and easy to use. The only difficulty with it and most others is lining it up exactly with the tonearm pivot. The pencil is taped to the line on the protractor to improve the alignment. A little ingenuity of that sort will allow you to minimize the possibility of alignment error. The function of these protractors is to find the pivot-to-stylus distance that allows the stylus to sit exactly on the two placement points as well as the cartridge, and therefore, hopefully, the stylus, being parallel to the grid. Be warned that there are several mathematical formulas behind these protractors. The two most prominent ones were named for their creators, Baerwald and Stevenson. They differ in where on the record they seek to minimize tracking error, and, except for a few zealous proponents of each, achieve more or less the same audible result.
Now, we will adjust the tracking force of the cartridge. This is a straightforward process following the tonearm manufacturer’s instruction.
In all cases, if the tonearm has anti-skate or bias adjustment, disable or set it to zero. Never rely on the gradations that may be marked on the arm or counterweight except as a rough guide. Too little weight and mis-tracking will ensue, too much, and the delicate suspension of the cartridge will be damaged. There are more and more electronic scales coming on the market to do this with astonishing accuracy but they’re expensive and some, being magnetic, will damage your cartridge. For almost 30 years I have relied on the simple, effective and inexpensive Shure SFG-2 beam balance. It won’t be accurate to two decimal places, but because we’ll be fine-tuning by ear, that won’t matter. For now, setting VTF, Vertical Tracking Force to roughly the cartridge maker’s specification will do.
It’s important to know that setting Vertical Tracking Angle is simply a means of getting Stylus Rake Angle right, i.e., raising or lowering the arm to find the VTA “sweet spot” you read so much about is worthless by itself. You make this adjustment to get the Stylus Rake Angle, or SRA, as near the same as was the cutterhead that cut the record. You want the top of the stylus to be a bit farther from the pivot than the tip: 1 or 2 degrees.
Most manufacturers advise having the headshell parallel to the record, but this is merely a starting point. Achieving the proper SRA may mean having the cartridge tail up or down. Once the SRA is set visually, which probably will require a 6X magnifier, it’s time to listen to some music. Play a selection of female voice with good dynamics from soft to loud. With correct SRA, the voice will be as clear during loud, high treble passages as soft. If you hear distortion, the angle needs to be corrected.
As with most things, there is evil to go along with the good here. The perfect SRA/VTA for a thin record will not be the same for one thicker. Consequently, don’t use a wonderfully thick 200 gram recording or an incredibly thin Dynaflex for your listening tests. Choose something in between and live with the compromise.
Third in line is setting cartridge/stylus Azimuth. It needs to be just as the cutterhead was, at 90 degrees to the record. On tonearms with detachable headshells, it’s quite easy to rotate the headshell a bit. Some fixed headshell arms allow for rotating the arm tube but others don’t. In the latter case, it will be necessary to shim the cartridge between its top and the underside of the headshell to correct the Azimuth.
As with SRA, a visual setting must be followed by the listening test. Don’t let the evidence of your eyes keep you from setting Azimuth at other than 90 degrees if it sounds better. You will find that Azimuth may be the most audibly adjustable parameter of the four, so do take your time with it.
Finally, you want to set the lateral tracking bias or anti-skate. Anti-skate is the resistance to the stylus’ desire to ‘skate’ towards the center of the record.
Theoretically, skating will cause an uneven pressure on the sidewalls of the groove which contain the two discrete undulations of the stereo signals resulting in an unbalanced stereo image. It’s a somewhat controversial parameter. Many people don’t believe in it and leave it at zero. That’s because there are other factors including the room and the recording itself that also influence the stereo image. One major audiophile turntable manufacturer doesn’t even have an anti-skate adjustment on his arms. The majority do, however, and the usual recommendation is to set it the same as the tracking force and that’s a good place to start. Playing music with a lot of balanced content in each channel, like a Count Basie ‘big band’ album will tell you what you need to hear. When anti-skate is off, there will be a stereo image but one channel will seem less dynamic, lifeless, in relation to the other. The difference is subtle but worth pursuing. As you change the bias setting, the offending channel will ‘snap’ into focus and be equally dynamic.
With all these adjustments done, Vertical Tracking Force and subsequently, Stylus Rake Angle must be re-visited. I know it’s tedious, but it is worthwhile. Lower the tracking force (with the anti-skate disengaged) somewhat and listen. Better or worse? Find the optimum by ear. Changing the tracking force will change the SRA so you must conduct your listening test of that parameter again as well. Finally, re-check the anti-skate as it, too, will change in relation to the tracking force.
As much as I hate doing math, this article would be incomplete without mention of arm/cartridge compatibility. Because the stylus is attached to the cartridge with a suspension, the compliance of the suspension must be compatible with the combined mass of the arm and cartridge including headshell and screws. A mismatch, too stiff a suspension, for example, with a low mass arm will cause the assembly to resonate audibly at very low frequency. A rule of thumb is that high compliance cartridges of 20 uF centimeters/second should be paired with low mass arms and medium to low compliance, with high mass. There is a very worthwhile Cartridge Database that has complete listings of nearly all cartridge specifications and a calculator for discovering those most suitable for a given arm. No math required.
It is my hope that the information here will help anyone to achieve the wonderful musical experience that is contained in every vinyl record. Please use it as a beginning, not an end, to finding your own musical “sweet spot”. All I’ve done is to try to assemble, in one place, all the vast knowledge on the subject contained in the Internet and cull out what my own preferences and prejudices disallow. Turntable set-up can be a hobby in itself; there is so much more to learn and do than the beginnings contained here. Please avail yourself of the information contained in the following links.