In late 2014 I started thinking about some home remodeling, including a major reconstruction of my dedicated music room. After 18 months of planning, we finally got started in April of 2016. Construction, much of it actually was destruction, took 5 months and was completed in September 2016. This article describes the planning process, construction decisions, problems that arose during construction, and the amazing things I learned during the process. In Part 1, I will describe the room as it was, the specific goals I set when we began the redesign, and the resulting design that the construction plans were based on. In Part 2, I’ll describe the construction process, the new opportunities that arose during construction, the unexpected problems that arose and how they were solved, and the final result, including a backlog of new equipment to review.
The room as it was
My dedicated listening room is 25′ 7″ long, 21′ wide and 8’2″ high. There were typical entry doors on the east, west and south walls, and the north wall had 12 horizontal feet of non-operable windows that were 6 feet off the floor and 18 inches tall.
The room used to be a 2-car garage that was converted into a usable room. The garage had a concrete floor that was 18 inches below the floor level of the home, so a raised wooden floor had been installed that rested on a series of 2×8 wooden beams that made the room floor level with the rest of the first story of our home.
The room had some asymmetry because of a wedge-like protrusion into the ceiling near the west side of the rear of the room. The protrusion was the result of a stairwell to the second floor that was located on the other side of the west wall.
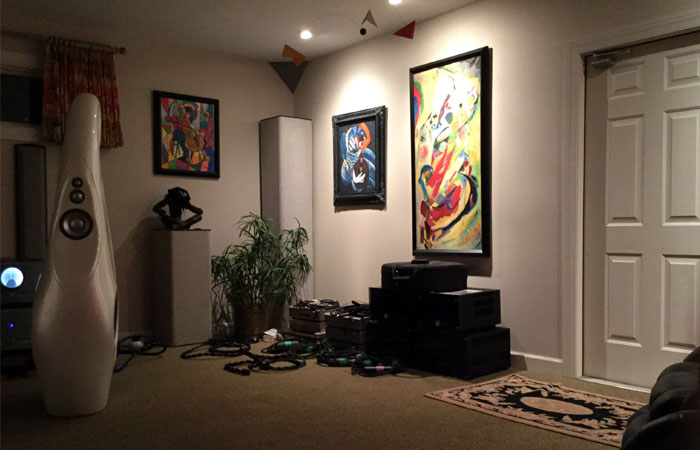
The room was carpeted, and was outfitted with free-standing bass traps and other acoustic treatments. It also sported 3 dedicated electrical outlets – two 20-amp outlets for amps and one 15-amp outlet for the front end. Those circuits were separate from the other electrical circuits in the room and were run from a separate dedicated electrical panel.
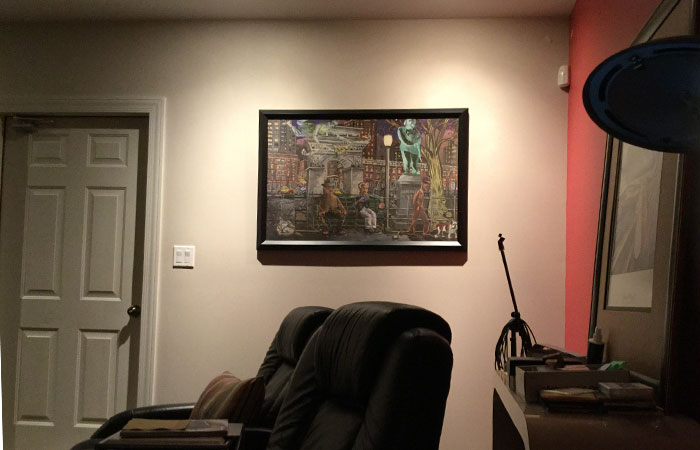
Below are some pictures that will give you a better sense of the room as it was.
Because of the position of the doors, my equipment setup is arranged along the long north wall of the room, and the listening position is on the south wall of the room.
- (Page 1 of 2)
- Next page →


great looking room..great looking system…
Thanks! Those are the “before” pictures. Hope you like the “after” pictures better when you see them.
Have you considered organizing and cleaning up the ugly cabling?
Definitely. Part 1 of the article has the preconstruction pictures. Part II will have the “after” pictures. I should note that the room had a lot of unused extra equipment and cabling when the pictures were taken, all of which were removed when construction started. Some of the pictures show the extra cables.
What a great introduction to set the stage for the second part. I hope that as part of the article, you will address some of the choices you made and the reasons for those choices. For instance, why GIK and not ASC tube traps? Likewise, it would be interesting what you used for fill in your bass trap and how you determined the correct amount of fill. My experience is that you can over-damp a space. Did you use any diffusion, particularly behind your speakers?
Would like to learn more about your project because I recently upgraded my AC panel and wiring. I’m a big fan of room treatment, and have used GIK and ASC traps. It would be helpful to see your room diagram.
Very interesting! As it happens, I am currently remodeling a very similar room (former two car garage) so have faced some of the same questions. (For example, I had a new panel installed, but opted not to use the JPS in wall cable but did use ten gauge wire for four dedicated circuits. Using advice from Martin Logan’s website, I’ve run a ground wire from each outlet to the next, then to the panel. I’m lucky to have a cement floor, but I had it leveled with Artex leveling cement. I’ve added skylights, but don’t know what effect the shafts will have on the sound. Currently, I’m deciding whether to simply carpet or to add a wood floor with a large area rug over it. Thanks for sharing your experience. I’ll be looking forward very much to reading your next installment!